



Cart
You have no items in your shopping cart
(2026 Guide Update) From Full Frame to APS-C and smartphones, learn how pixels, sensor sizes, and photosites impact image resolution, low light, and print quality—and how many megapixels you actually need.
One of the most frequent conversations we have across the counter here at Seawood Photo—whether someone is picking up their very first used mirrorless body or trading in a bag of lenses for a flagship camera—starts with the exact same question:
“How many megapixels does it have?”
That first question is almost always followed by a second: “Is that a lot?”, “How big of a print can I make?”, or increasingly in 2026, “Wait—my phone says it shoots 48 megapixels. Why does this 24-megapixel camera take so much better photos?”
Beneath all of those questions lies the real dilemma every photographer wants answered: How many pixels is actually enough, and why does the physical size of the sensor matter just as much as the resolution? What does it even mean?
Here is our no-nonsense guide to understanding pixels, print and screen resolution, and sensor physics—written in plain English so you can spend less time decoding spec sheets and more time making great photographs.
Since the word pixel comes up in every conversation about digital imaging, cameras, and printing, a quick primer is in order.
A Pixel (short for PIXture ELement) is the fundamental building block of any digital image. Think of pixels like individual letters printed on a page of a book. String individual letters together and you form words, sentences, and paragraphs; string millions of pixels together in a grid and your eyes perceive a continuous photograph. One megapixel (MP) is simply one million pixels.
When light passes through your camera lens, it strikes the digital image sensor. That sensor is covered in millions of microscopic light-sensitive cavities called photosites. Each photosite collects light and converts it into an electrical charge representing brightness, which is filtered through a color mosaic (most commonly a red-green-blue Bayer array or Fujifilm's X-Trans array) so the camera's processor can calculate full color and write the image file to your memory card.
|
1. LENS & LIGHT
Photons focused by lens glass
|
2. BAYER FILTER
50% Green, 25% Red, 25% Blue
|
3. PHOTOSITES
Counts photon electrical charge
|
4. PIXEL GRID
Full-color RAW / JPEG image
|
In practice, there isn't always a strict 1-to-1 match between a physical sensing site on the sensor and a final pixel in your file, nor on the output side:
Once an image is captured, those pixels can be adjusted, color-graded, or deleted. Keep one golden rule of physics in mind: real optical information can be thrown away after the shot, but it cannot be conjured out of thin air. When you crop heavily into a photo, you are permanently discarding pixels.
With that foundation, the kneejerk answer to “How many pixels is enough?” seems like it should be “As many as possible!” But in the real world, how many do you actually need?
The answer depends entirely on how you view and share your work, and on a crucial concept: viewing distance.
In the early days of digital photography, bulky CRT tube monitors displayed roughly 70 to 90 pixels per inch (PPI). Today, a standard 27-inch 4K monitor displays around 163 PPI, Apple's Studio and Retina displays run at 218 to 254 PPI, and modern smartphones pack over 450 PPI.
Yet even on a razor-sharp 4K Ultra HD television or desktop monitor, the entire screen resolution is 3840 x 2160 pixels—which works out to just 8.3 megapixels. Even a massive 5K studio display (5120 x 2880) is only 14.7 megapixels, and social media platforms routinely compress uploads down to 2 or 3 megapixels.
That means if you only ever view your photos full-screen on a 4K display or share them online, any camera with 12MP to 24MP already captures far more detail than the screen can physically show at once.
Print is much more demanding than a screen when viewed up close, which is why fine-art photographers care deeply about resolution. For a gallery-grade print that you can inspect nose-to-paper, 300 PPI is the gold standard, while 200 to 240 PPI still looks tack-sharp from normal arm's-length viewing:
| Camera Resolution | Pixel Dimensions (3:2) | Max Print @ 300 PPI (Gallery) | Max Print @ 200 PPI (Wall) |
|---|---|---|---|
| 12 MP (Sony A7S III, Nikon D700) | 4240 x 2832 | 14″ × 9.4″ | 21″ × 14″ |
| 24 MP (Sony A7 III, Nikon Z6 III, Canon R6 II) | 6000 x 4000 | 20″ × 13.3″ | 30″ × 20″ |
| 33 MP (Sony A7 IV, a6700) | 7008 x 4672 | 23.4″ × 15.6″ | 35″ × 23″ |
| 40–45 MP (Fuji X-T5, Nikon Z8, Canon R5 II) | 8192 x 5464 | 27.3″ × 18.2″ | 41″ × 27″ |
| 60 MP (Sony A7R V, Leica M11 / Q3) | 9504 x 6336 | 31.7″ × 21.1″ | 47.5″ × 31.7″ |
| 100 MP (Fujifilm GFX 100 II, Hasselblad X2D) | 11648 x 8736 (4:3) | 38.8″ × 29.1″ | 58″ × 43.7″ |
(Note: When you print a billboard or a large wall mural, viewing distance increases dramatically—so even a 24MP file can be printed wall-sized when viewed from across a room!)
If 24 megapixels can already make a gorgeous 20″ × 30″ print, why do cameras with 45MP, 60MP, or 100MP exist?
Aside from large-format gallery printing, the biggest everyday benefit is cropping latitude. Remember that cropping is throwing away recorded pixels. If a red-tailed hawk is perched far out across the Marin Headlands overlooking the Golden Gate Bridge and you crop your frame in half horizontally and vertically, you throw away 75% of your pixels:
|
FULL FRAME (100% AREA)
25% KEPT
Outer 75% Discarded
|
Starting with 24 MP:
6 MP
Max gallery print: 10″ × 6.6″ @ 300 PPI
Starting with 60 MP:
15 MP Kept
Max gallery print: 16″ × 10.5″ @ 300 PPI
|
Here is where technical specs meet the art of photography. Having 45 or 60 megapixels can make it tempting to get lazy—to shoot wide and “fix the composition later in Lightroom.”
If you frame your photograph intentionally in the viewfinder, step closer, or use the right focal length lens, you preserve every bit of optical resolution and tonal gradation your sensor captured. Relying on heavy post-production cropping throws away light, increases visible noise, and magnifies lens flaws. Good composition in the camera beats extra megapixels every single time.
Before we leave resolution behind, let’s clear up one of the most misused pairs of acronyms in photography: PPI (Pixels Per Inch) and DPI (Dots Per Inch) are not the same thing.
For example, a professional Epson SureColor or Canon imagePROGRAF photo printer might boast a resolution of 2,880 DPI or 4,800 DPI. That does not mean you need a 2,880 PPI image file! Because ink cannot change brightness on its own, the printer sprays a microscopic pattern of dozens of cyan, magenta, yellow, and black ink dots to blend together and form one single pixel of your image. Most fine-art inkjet printers accept a native image input of 300 PPI (Canon) or 360 PPI (Epson) and use thousands of ink dots per inch to render smooth, continuous tones.
|
IMAGE FILE: 300 PPI
1 PIXEL
1 solid logical square of color data
|
4K / RETINA MONITOR
Lit by microscopic RGB sub-pixels
|
INKJET PRINT: 2,880 DPI
• • • •
• • • • • • • • • • • • Dozens of CMYK ink droplets per pixel
|
The second specification we explain every day at the shop is sensor size. Unlike film days—when every 35mm camera used the exact same 36mm × 24mm strip of film regardless of whether it was a $100 point-and-shoot or a professional Nikon F3—digital cameras come with wildly different sensor dimensions.
| Sensor Format | Dimensions | Surface Area | Crop Factor | Common Camera Examples |
|---|---|---|---|---|
| Medium Format Digital | 43.8 x 32.9 mm | ~1,441 mm² (1.67× FF) | 0.79× | Fujifilm GFX 100S II, Hasselblad X2D 100C |
| Full Frame (35mm) | 36.0 x 24.0 mm | ~864 mm² (100% baseline) | 1.0× | Sony A7 IV / A7R V, Nikon Z6 III / Z8, Canon R6 II / R5, Leica M11 |
| APS-C (Crop Frame) | 23.6 x 15.6 mm | ~368 mm² (~43% of FF) | 1.5× | Fujifilm X-T5 / X100VI, Sony A6700, Nikon Z50 II, Ricoh GR IIIx |
| Micro Four Thirds (4/3″) | 17.3 x 13.0 mm | ~225 mm² (~26% of FF) | 2.0× | OM System OM-1 II, Panasonic Lumix GH7 / G9 II |
| 1-Inch Type | 13.2 x 8.8 mm | ~116 mm² (~13% of FF) | 2.7× | Sony RX100 VII, Canon G7X III |
| Smartphone Main Sensor | ~6.4 x 4.8 to 9.8 x 7.3 mm | ~30–70 mm² (3%–8% FF) | 3.5×–5.6× | iPhone Pro, Google Pixel, Samsung Galaxy |
A quick note on the math: People often say an APS-C sensor is “two-thirds the size of Full Frame” because its width (23.6mm vs. 36mm) is about 66% as wide. However, because area is width times height, a Full Frame sensor actually has more than 2.3 times the total light-gathering surface area of an APS-C sensor, and nearly 4 times the surface area of a Micro Four Thirds sensor!
Why does sensor surface area matter so much? And why would a company like Sony sell a 61-megapixel A7R V, a 33-megapixel A7 IV, and a 12-megapixel A7S III—all with the exact same Full Frame sensor size?
Obviously, pixel quantity isn't everything. It comes down to photosite size—how big each individual light receptor is on the chip.
Thanks to Albert Einstein—who actually won the 1921 Nobel Prize in Physics for formulating the Photoelectric Effect, not for his Theory of Relativity!—we know that light behaves as discrete packets of energy called photons. When photons strike a silicon photosite on your camera sensor, they knock electrons loose, generating an electrical charge proportional to the amount of light collected.
If you pack 12 million photosites onto a Full Frame sensor instead of 60 million, each individual photosite can be much larger.
Think of it like catching rain in a 12-inch bucket versus a 5-inch coffee can. Leave both out in a Marin downpour for the exact same amount of time, and the 12-inch bucket collects dramatically more water. In a camera sensor, a larger photosite collects more photons during your shutter exposure, creating a much stronger, cleaner electrical signal and holding more light before overflowing (what engineers call full-well capacity, which gives you richer dynamic range in bright highlights and deep shadows).
|
PART A: PHOTOSITE SIZE = RAIN BUCKET
|
PART B: ISO = STEREO VOLUME KNOB
Large Photosite (Clean Signal, Low Gain):
CLEAN LIGHT SIGNAL (92%) • Minimal Hiss
Tiny Photosite @ High ISO (Volume Cranked to 10):
Cranking ISO amplifies background static & noise.
|
Why is starting with a strong electrical signal so important? Because of noise.
Every electronic circuit has a tiny amount of background electrical static—a “noise floor.” When you shoot in dim light and raise your camera's ISO from 100 to 6,400 or 25,600, you are not making the sensor physically more sensitive to light. Instead, you are turning up an electronic amplifier.
It works just like the volume knob on a vintage stereo receiver:
In photography, that electrical “hiss” shows up as blotchy color speckles and luminance grain in your shadows. A larger sensor (or a sensor with larger photosites) gathers more photons up front, requiring less amplification—resulting in cleaner low-light images, smoother color transitions, and wider dynamic range.
(Modern Bonus—Back-Side Illuminated & Dual Native ISO Sensors: In recent years, sensor engineers have made smaller pixels much more efficient by moving the microscopic metal wiring behind the light-collecting silicon—called BSI or Back-Side Illumination—and building Dual Native ISO circuits that switch to a cleaner secondary amplifier at higher ISOs. Even so, the laws of physics still hold: a bigger sensor always collects more total light!)
This brings us back to the most common question in 2026. If a modern smartphone has a 48MP or 50MP sensor, why doesn't it match a 24MP Full Frame or APS-C camera?
Look back at the sensor size chart above:
There is no single “best” sensor size or megapixel count—every format is a tradeoff between light gathering, file size, lens weight, and budget:
Specs and numbers on a screen only tell half the story. The best way to know whether you need a pocketable APS-C street camera, a balanced 24MP full-frame hybrid, or a 60MP resolution monster is to hold them in your hands and compare the files yourself.
At Seawood Photo in San Rafael, we have been helping Northern California photographers navigate cameras and lenses since 1947.
Happy shooting!
```
(2021 Guide)
One of the most frequently asked questions by customers buying their first digital camera - new or used is “How many megapixels?” and usually followed by “is that a lot?” or “what does that mean?” or “how big a print can I make?” The basic gist of the 2nd set of questions is really “How many is enough?” (1 megapixel == 1 million pixels) The discussion of Pixels is usually referred to as “resolution” of the image.
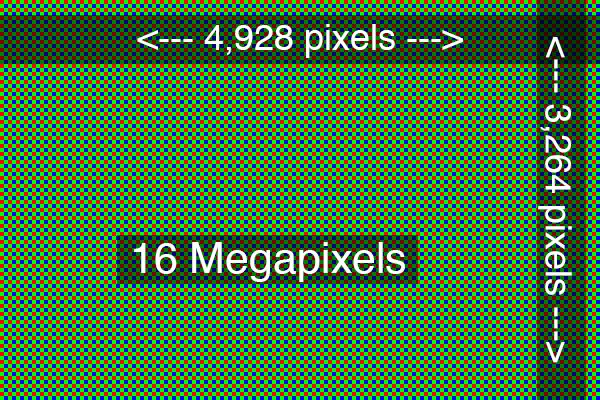
Since the term “pixel” will come up a lot in any discussions involving digital imaging (camera, printing, scanning etc), a quick primer is in order here. A Pixel (PIXture ELements) is the basic building block of any digital image. All digital images are made up of pixels – cameras capture images on their sensors in pixels; printers strings pixels together with ink to form an image. The logical equivalent of pixels in images is the individual alphabets on a page of text. String individual alphabets together on a page and you can make up words, sentences and paragraph. The sensor in a digital camera will capture light image cast on it by the lens and convert the light into pixels of information – each pixel representing color and brightness. The computer chip in the camera will combine pixel information and write a file onto the media card. In practice, there may or may not be a 1-to-1 correspondence between a Pixel of information and a Light Sensitive Sensing site on the sensor. Some sensors combine multiple sensing sites to produce a pixel of information. On the output side (printer or monitors) a few drops of ink or multple clusters of tiny LED lights may be combined to display a pixel of information. So, regardless the technology involve, pixels are the basic building block of all digital images – from point of capture to output – and once captured, they can be manipulated, modified and deleted. But keep in mind that information once captures/recorded can only be destrroyed but not created – ie you cannot create more information for the colletion of pixels you captured but you can throw them away (aka “cropping.”)
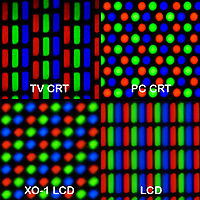
With this background knowledge, the obvious answer to the question “how many pixels is enough” is a resounding “as many as possible.” But in practice, how many do we really need?
The answer depends on what you want to do with your images because of the practical limits of the technology used to present your images. The older crappy CRT (tube) monitors are capable of about 70 pixels per inch (ppi) whereas modern flat panel (LED/LCD) displays are around 90ppi. If you have an Apple product, you are spoiled - all their displays are much higher than 120ppi. The new iMac Retina screen displays at 325ppi and non-Retina at over 200ppi. However, what is even more important is that when images are viewed on a screen, no one expects to see a huge picture and we all view our screens from further away than when viewing printed material - so the pixel count required for displaying images is a lot less demanding than for printed output. The rule of thumb (“back of the envelope”) estimation is 100ppi for images on screen. So, if you display a 800 x 600 pixel picture on a monitor it will show up as approximately 8” by 6” picture when viewed at 100% If you view the same image on a 200ppi screen, the 800x600 pixel images will be 4” by 3”. In reality, we seldom view images on the screen at 100% and when we don’t the computer will “squish” the image for you by various algorithm to throw away unwanted pixels to make a good looking smooth image. Then what is the advantage of capturing an image of 6000x4000 pixels (24megpixel)? Having more information means that you can crop into the picture without getting below the threshold of an acceptable size for viewing. Think of cropping as throwing away recorded information. The more you crop into your image to highlight or compose your picture, the more information you are throwing away. So, if you start out with more information, you can afford to throw away more.
Now, we get to the Art of Photography and the importance of composition. If you compose your picture properly you don’t have to crop as much - you are not throwing away information captured. If you are sloppy in your camera technique, you will have to “compose" in post-production - aka “crop the heck out the image to make it look good!” That’s why you should read up on the art of photograghy, on composition and to invest in the appropriate lens to get most out of your photography - compose it correctly in the camera and you don’t have to throw so many pixels away in post-production.
One very important distinction to note when discussing resolution is that PPI (Pixels Per Inch) is NOT the same as DPI (Dots Per Inch) even though these terms are often used interchangeably – but wrongly. Pixel is the smallest logical unit of an image. Dots may refer to the actual drop of ink a printer can print or the smallest light source that a monitor can display. The new photo Epson printer, for example, boasts the ability to print at 2880 dpi – ie it can put out such fine drops of ink and move the paper and head in such minute steps that it can put 2,880 drops of ink per inch of paper. That’s not pixels – it means is that it will use multiple drops of ink to construct a pixel of image. The best Epson photo inkjet printer will print at only 360ppi. The same goes with display monitors - there are millions of LED/LCD lighting dots on your monitor screens and a clusters of them are lit up to display one pixel of your image. A historical note is in order here: the original HP Laserjet Print I – the very first laser jet printer indeed used only 1 dot of toner per pixel – thus for that printer, PPI is the same as DPI and thus the origin of the confusion. Today, of all the digital imaging devices, only scanners have a DPI to PPI equivalent of 1 to 1, ie if you scan your images on a scanner, the scanner DPI setting will give you the PPI resolution.
Another one of the digital camera specification we have to explain to our customers most frequently is sensor size. The most popular “standard” sizes are “Full-Frame”, “Crop Frame” also knowns APC size and Four-Thirds (4/3). Many other cameras, especially Point & Shoot class of cameras have their own smaller size sensors. The Full-Frame (Nikon calls them FX) sensor is the same size as the 35mm image frame, ie 36mm wide by 24mm high. The Crop-Frame or APC (Nikon calls them DX) sensor is about 75% the size of the Full-Frame, about 24mm wide by 14mm high with some slight variation among different brands. The 4/3 sensors are about 50% of the size of the Full-Frame, about 18mm wide by 12mm high; again with some slight variation among different brands.
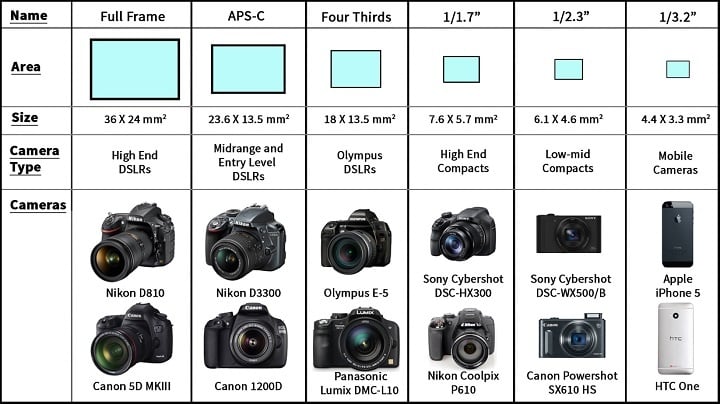
So, what is the effect of imaging with different size sensors? The image sensor in digital cameras consists of basically a large (millions) array of light sensitive sites to collect light. Thanks to Albert (Einstein that is) we can think of light as particles of photons. Photons hitting the sensors cause electrical impulse to be generated and by recording and organizing these electrical impulses, your camera’s computer assembles the image for you. The array light sensing sites on the sensor is organized into clusters. The number of clusters in your camera determines the total number of pixels your camera can create for an image. So, obviously the large size sensor can have more sensing sites than the smaller sensor. The sensor array is really the eyeball of your camera and it is the most expensive and most challenging part of the camera to produce. In the early days of digital cameras, it was very expensive and a major engineering challenge to produce large sensor arrays at a commercially sellable price, thus the early digital cameras had small sensor arrays. As technology progressed and cost reduced, producing full 35mm x 24mm size (35mm film size) sensor arrays became economically viable and the race for more pixels began.
The race for more and more pixels came to the attention of photographer when the Sony A7 mirrorless with 24 megapixel (mega=million) was followed by the A7R with 36 megapixels and then followed by the A7s with only 12 megapixels. What’s going on here? Well obviously quantity is not everything!
Everything being equal, Sony can use larger pixel sensor to pack 12 megapixels than 36 megapixels on the same size surface area. The advantage of using larger sensing sites is higher sensitivity and here's why. Again thanks to Albert who figured out that the amount of electrical current generated is proportional to the number of photons hitting the sensing sites means that collecting more photons translates to higher level electrical signals. (He was awarded the Nobel prize for formulating this “photoelectric effect” and not for his more famous Theory of Relativity!) The analogy is catching rain with a 12” bucket versus a 5” coffee can. Leave them both out in the rain for the same amount of time and the 12” bucket will have collected more water than the 5” coffee can. Why is this important? Because the more signals a sensor can generate means that the circuitry needs to amplify the signal less, and the less amplification, the less “noise.” Electrical noise translates to graininess. It’s like the volume control in your radio or hifi - turn up the volume and the amplifier will amplify both the signal and noise – you’ll notice the noisy “hisses” only when you crank up the volume. With initial stronger signal level, less amplification, thus less noise. When you crank up on your ISO setting, you are turning up the “volume” control. The A7s, because of its large sensor size can famously shoot at very high ISO up to 512,000 with minimal noise because it started out with large signal. The bottom line is that the large the sensor, the more light can be captured which give the camera a better performance in low light situation when your camera is set a high ISO. There are also advantages associate with the field of view and depth of field which we will cover in subsequent articles.
Written by Yau-Man Chan